Building Your Artwork in Illustrator
This quick tutorial will walk you through how to open your dieline in Adobe Illustrator and build artwork that meets our criteria. This walkthrough assumes you have basic familiarity with Adobe Illustrator or a similar vector based software.
If you've never used a vector-based illustration program, you might consider hiring a professional graphic artist. If you need professional graphic design help, you can consult different companies such as Otterburn & Co, Design Crowd, 99Designs, and Fiverr; they offer fantastic custom designs that won't break your budget.
Right click on your PDF dieline and select Save As or drag the file to your desktop.
- Open Adobe Illustrator.
- Select
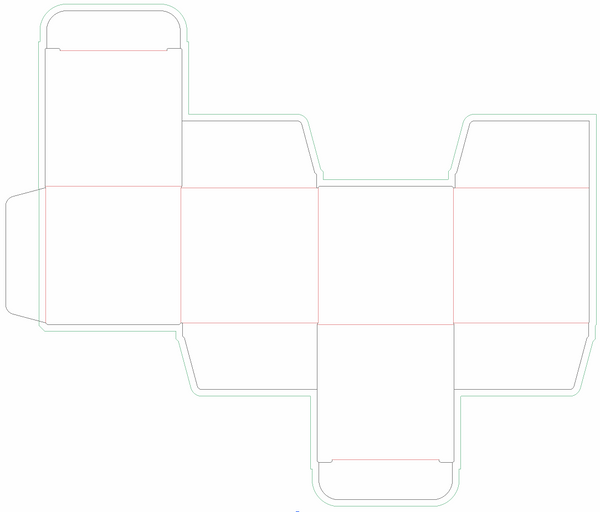
File > Openand select your file from the location where it was saved. You will be presented with your custom dieline.
-
In your
Layerspanel, create a new layer and drag it beneath your dieline layer. Be sure your dieline is always visible and the top-most layer in your file.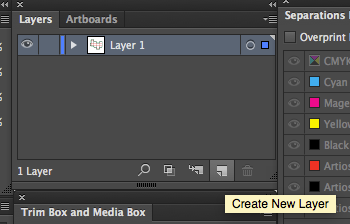
- If you selected "Print - Outside & Inside" when ordering your box, you will receive a two-page dieline file by email. Make sure you have the latest version of Adobe® Illustrator to open both pages of your dieline - the first page on the left is your outside artwork, and the second page on the right is your inside artwork. Lock your dieline layer and create a new layer to insert your artwork for both sides of your box.
- Design your fantastic item! Place your custom artwork in the new layer that you created in step 3 or 4. Make sure to follow all of our artwork guidelines. For help with how to use Adobe® Illustrator click here.
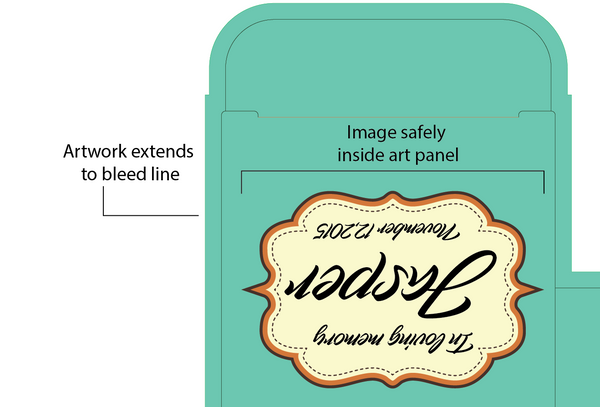
- When designing your item, make sure your artwork is inside of the green bleed line. Any color or artwork that should print to the edge of your item needs to bleed past the edge of your item 1/4 inch. Any artwork outside the bleed line will be automatically removed during artwork processing. All important images and copy should be at least 1/8 inch from cut and crease lines.
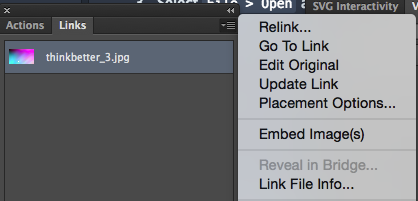
- Embed all images. In your
Linkspanel select the settings icon on the right and selectEmbed Image(s)
- Outline all fonts. First select all items on your document by pressing
command + Athen selectType > Create Outlines

Color Mode is CMYK. File > Document Color Mode > CMYK Color 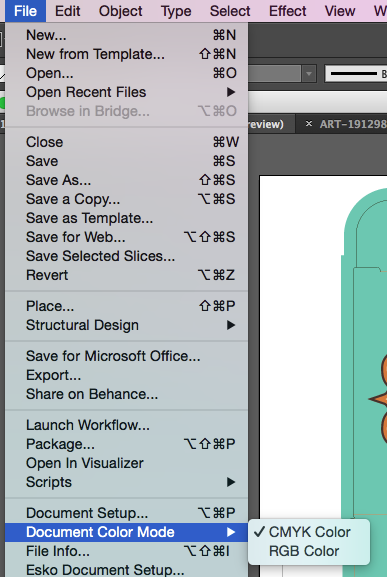
Here is an example of artwork ready to be saved:

10. Select File > Save As to save your new PDF. You can use the default Illustrator settings.

11. Now just log into your Fantastapack Account, select your order and upload your art! Don't forget to confirm your artwork upload by clicking on "CONFIRM"
